I made a video demonstrating the process I use to make some special trading cards. Here is my written description for Highlight Cards. These are just cool enough to make the extra effort worth it.
DIY Highlight Trading Cards
Leave a reply
I made a video demonstrating the process I use to make some special trading cards. Here is my written description for Highlight Cards. These are just cool enough to make the extra effort worth it.
 I have used Drupal for the last year or two and have finally gotten fed up with it. There are plenty of places online that discuss the benefits and drawbacks of each platform so I won’t do it here.
The main thing keeping me from going back to a simple WordPress installation was an easy way to move all my old content out of the Drupal CMS in a manner that would be simple to move it into a WordPress CMS.
I looked at some Modules built specially to do the task. I looked at some pay software as well. None of those options did what I needed. Even the pay program had poor reviews. Continue reading

I used to be very into playing paintball. Most of what I played was woodsball. Quite some time ago I made a Vest and shared my story at an online forum. I am sharing it here.
I thought I might share a vest that I have almost completed. Using about $10 worth of materials I’ve made a vest with (so far) a tank pouch, two pod carriers and a radio pocket. I also made a Remote Coil cover, not pictured.
I have enough fabric left over to make large pocket for the front, opposite the radio pouch.
I got my digital camo fabric from a fabric store for around $5.95 a yard and only got one yard. Continue reading

I’ve had the card game Fluxx for several years now. I really enjoy playing it. I’ve recently started playing again with some friends. We’ve been playing the Zombie version
mostly. The game is designed to mix versions and create new cards as you wish.
I decided to make a few cards to add to my set using the DIYTC 2.0 and a program called Magic Set Editor.
They don’t riffle shuffle very well but it’s a lot of fun having these new cards in the deck so I employ the Corgi shuffle instead. So that we don’t have to straighten the pile back out we play with a messy draw pile, which is more fun anyway.

If you haven’t already, please see the preceding articles on making trading cards at home:
DIY Trading Cards, Part 1
DIY Trading Cards, Part 2: Making it Physical
DIY Trading Cards, Part 3: Specialty Cards
DIY Trading Cards, Part 4: Packs
DIY Trading Cards, Part 5: Card Box
DIY Trading Cards, Part 6: Binder
After I finished my first run of trading cards I decided to try another method. Instead of printing on a laser printer I printed 4×6 photo prints. I layout two cards to a page. The front and back layout pages match up pretty well when printed. You’ll still need to do some lining up before you print, but no more staring at a light bulb.
Here are the layout files.
cards4X6_f.png (11.0 kb)
cards4X6_b.png (11.0 kb)
You could use those files however, I created a new tool to help layout the pictures for printing. You can find it here. You can still make a 9 card layout if you wish. Just select the type of layout you want to make and drag your 750×1050 image into the window. You can also use a 1050×750 image, it will auto rotate.
For some reason this tool works best for me in Firefox.
This summer Walmart had 4×6 Prints for $0.09 and free shipping. I print matte, but glossy might be your thing. The image quality is much higher, and the photo paper is plenty thick to give you a solid card.
I suggest doing a couple test prints before trying your whole run. With Walmart the images are scaled up a small amount. The difference was more than enough to be worth correcting. I had to add a border of 12 pixels so that the cards would be the right size. If you use another provider try one or two and measure the results.
When you put the front and back prints together you can use the layout lines to line them up, then staple together. Remember to use photo safe Spray Adhesive. As usual, I would trim the side with the staples off first.
I use a Rotary Cutter with a straight edge now. I feel like I get more control that way.
For some fun you can try some Metallic Prints.
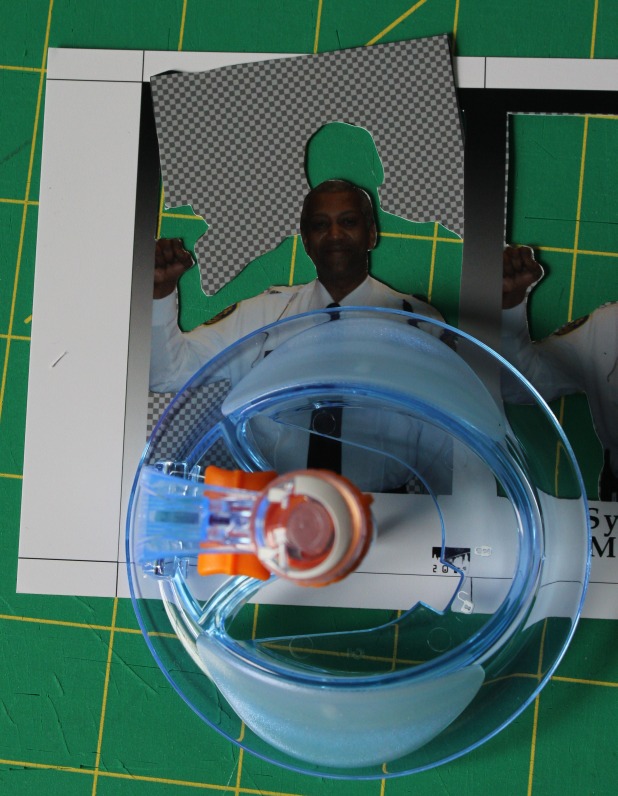
Hologram cards work well with this method too. All you have to do is cut out the background from the front picture before gluing all the layers together. I use a shape cutter like the Fiskars Ultra ShapeXpress but you could use an x-acto knife. This is much, much easier than painting.
If you haven’t already, please see the preceding articles:
DIY Trading Cards, Part 1
DIY Trading Cards, Part 2: Making it Physical
DIY Trading Cards, Part 3: Specialty Cards
DIY Trading Cards, Part 3a: Hologram Cards
A modification to the Hologram Card idea is to use glow in the dark paint to accent certain areas.
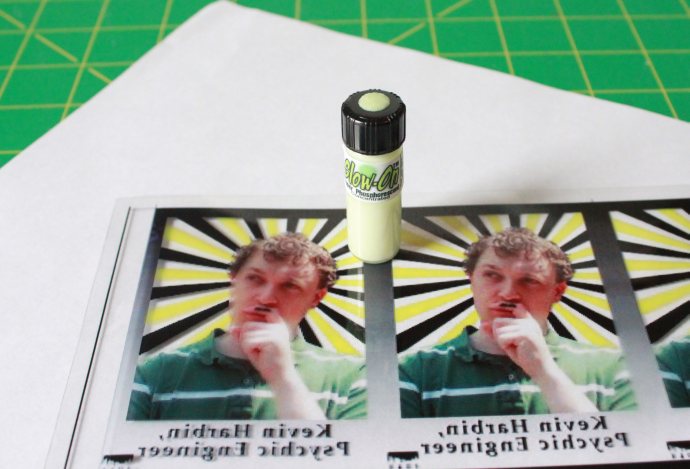
Paint where you want to glow, even over some of the ink.

Finish up with white everywhere you don’t want a hologram to show through, same as you do for hologram cards.
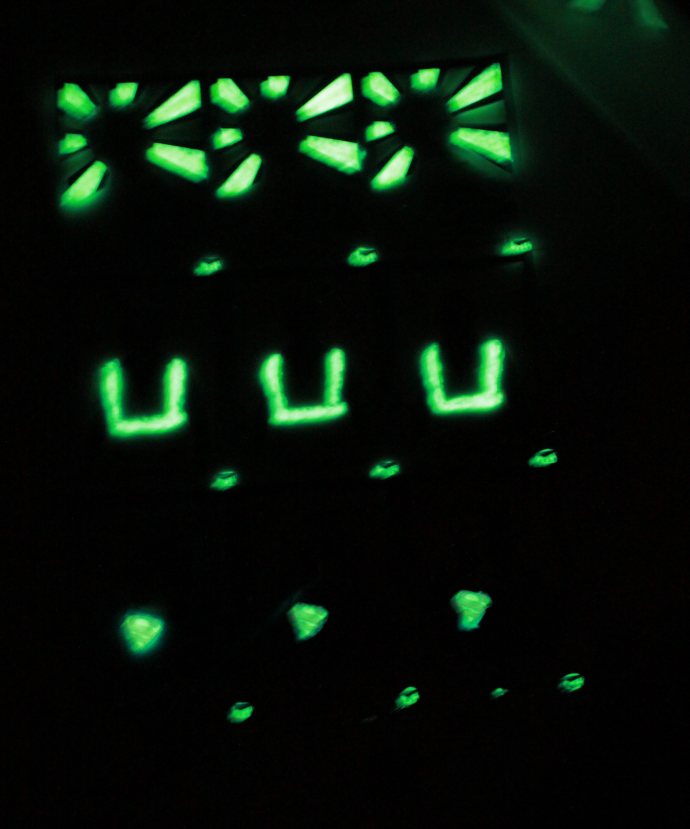
Trim as always and you’re done.

If you haven't already, please see the preceding articles on making trading cards at home:
DIY Trading Cards, Part 1
DIY Trading Cards, Part 2: Making it Physical
DIY Trading Cards, Part 3: Specialty Cards
DIY Trading Cards, Part 4: Packs
DIY Trading Cards, Part 5: Card Box
This one's pretty simple. To make a sweet binder to keep and display my cards, I used Zazzle. You can download a design guide for whichever size binder you want.
I made the 1″ binder. Now that I've filled it out with my first year of cards I wish I had gone for something a little larger. The upside is that I'll get to design another before too long.

If you haven’t already, please see the preceding articles on making trading cards at home:
DIY Trading Cards, Part 1
DIY Trading Cards, Part 2: Making it Physical
DIY Trading Cards, Part 3: Specialty Cards
DIY Trading Cards, Part 4: Packs
Now that you have your packs made, you’ll want to keep them somewhere until they get opened. Sure, a plastic bag or shoebox will do, but it’s boring. A box is very simple to make (compared to some of the other parts) and adds some zing.
This box is sized for two stacks of packs with inner dimensions of 4″ x 5.5″. It is made from magazine backerboards available online or at your local comic book store.
If these dimensions suit your needs you, can use my template.
I have included the native GIMP file and also saved to Photoshop.
Box_square.xcf (33.4 KB)
Box_square.psd (142 MB)
After you have have something you’re happy with, print it out. Cut along the edge.
If you’ve designed in a pop up cover, now is the time. You can trace it with a craft knife or follow the instruction from this guy to make perforations. Leave a few places still attached so that the lid holds together until you’re ready to have it open for good. Make sure you cut down to the halfway point (and only that far!) on the sides so that the lid will fit into the back.
Make a crisp fold for the corners. I used a straight edge and a wide putty knife for each fold.
Glue the corners together. Hold until dry.
Next Up: Binder

If you haven’t already, please see the preceding articles on making trading cards at home:
DIY Trading Cards, Part 1
DIY Trading Cards, Part 2: Making it Physical
DIY Trading Cards, Part 3: Specialty Cards
After you have designed and printed several varieties of cards, you may want to distribute them. A nice touch is with a custom package.
I have included the native GIMP file and also saved to Photoshop.
trading_card_pack.xcf (237 KB)
trading_card_pack.psd (634 KB)
The design can be as simple or as elaborate as you want.
Fold the short ends in first, then the two longer ones on top. Use either tape or a sticker of your choice to hold them closed.
Next Up: Card Box

If you haven’t already, please see the preceding articles:
DIY Trading Cards, Part 1
DIY Trading Cards, Part 2: Making it Physical
DIY Trading Cards, Part 3: Specialty Cards
A puzzle card is a pretty simple to make. Instead of designing one card at a time, design as a set of 9.
Choose a design that can be cropped/resized to 2250 x 3150. Place that picture onto the 9 card layout sheet and you’ve made the front of the card.
For the back you can either use another 2250 x 3150 picture or make them individual designs for each card. Place these in the desired order on another layout sheet. If you choose to number the cards, remember you are looking at the back, right to left, top to bottom.